
Action Sequence Photography

Want to shoot + edit action Sequences? Here's how.
First, you'll need three things.
1. A camera with continuous/burst mode – This mode lets you shoot multiple photos in rapid succession and is available on all DSLRs. While I recommend using a DSLR, you can do this with your iPhone in burst mode (just hold down the shutter button to do this).
Don't have a camera but want to improve your photoshop skills? You can download my sequence shots HERE and practice this process on them. If you're new to photoshop, I recommend starting with the easy sequence.
2. A tripod – This process will be smoother if you shoot the photos with a tripod, but you can still do this handheld. If you need a trusty, portable tripod, this is what I use.
3. Photoshop – This is where you'll edit the photos together. If you don't have photoshop, click THIS LINK here!
ShootING the PhotoS
Now that you have the equipment, let's shoot the photos.
1. Pick your subject – you're going to want fast-moving action. It can be a cliff jump, skateboard trick, or even your friend jumping off a roof!

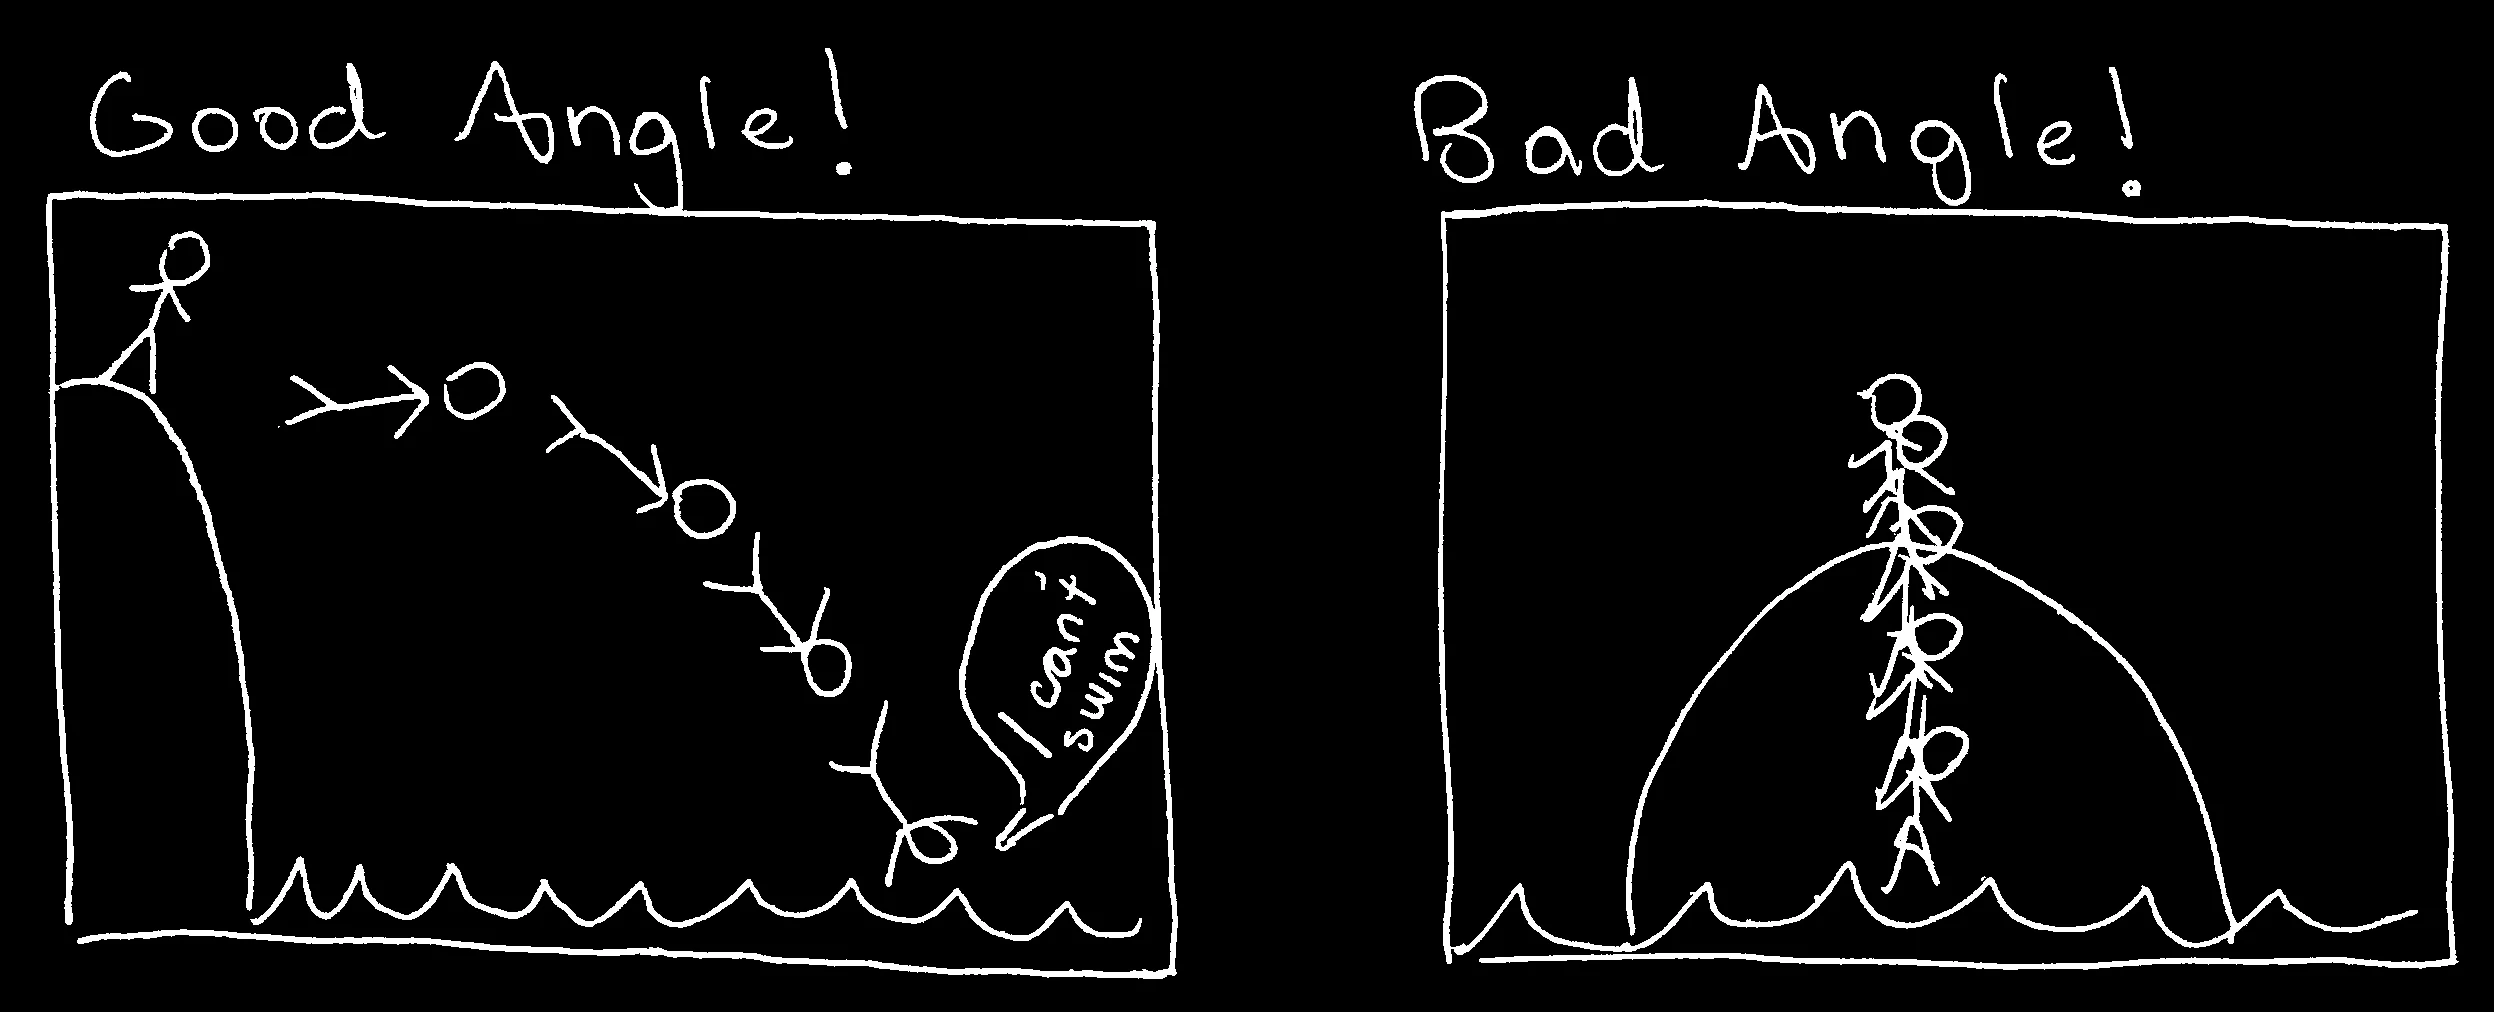
2. Get a good angle – you'll be shooting a sequence of photos and then stitching each shot together in photoshop. Make sure the subject moves ACROSS the frame to avoid subject overlap (see diagram below). If your subject is jumping a 30 foot cliff, this will easy because he's covering so much ground. If it's a smaller jump, you can make your subject cover more of the frame by being closer with a wide lens (like a fisheye or wide angle). Also position yourself so he jumps across the frame and not toward you.
3. Start shooting – Turn your camera onto continuous shooting and use a fast shutter speed. If you're shooting an action sequence, I recommend a minimum of 1/500" for your subject to be sharp. Feel free to use TV mode, or shutter priority, for this. Hold down the shutter to keep shooting a sequence.
If your camera can only shoot 5 or 6 photos in a sequence before stopping, it's likely because you're shooting in RAW and your memory card is struggling to process the images fast enough. Change the image quality to jpeg and you'll be able to shoot much longer sequences! Having the proper memory card also helps.
4. Shoot some more! You might not get the perfect sequence on your first try, so shoot it a couple times. To get a feel for how it'll turn out, quickly scroll through the photos on your camera and imagine them all in one frame. Try a couple different angles, too!
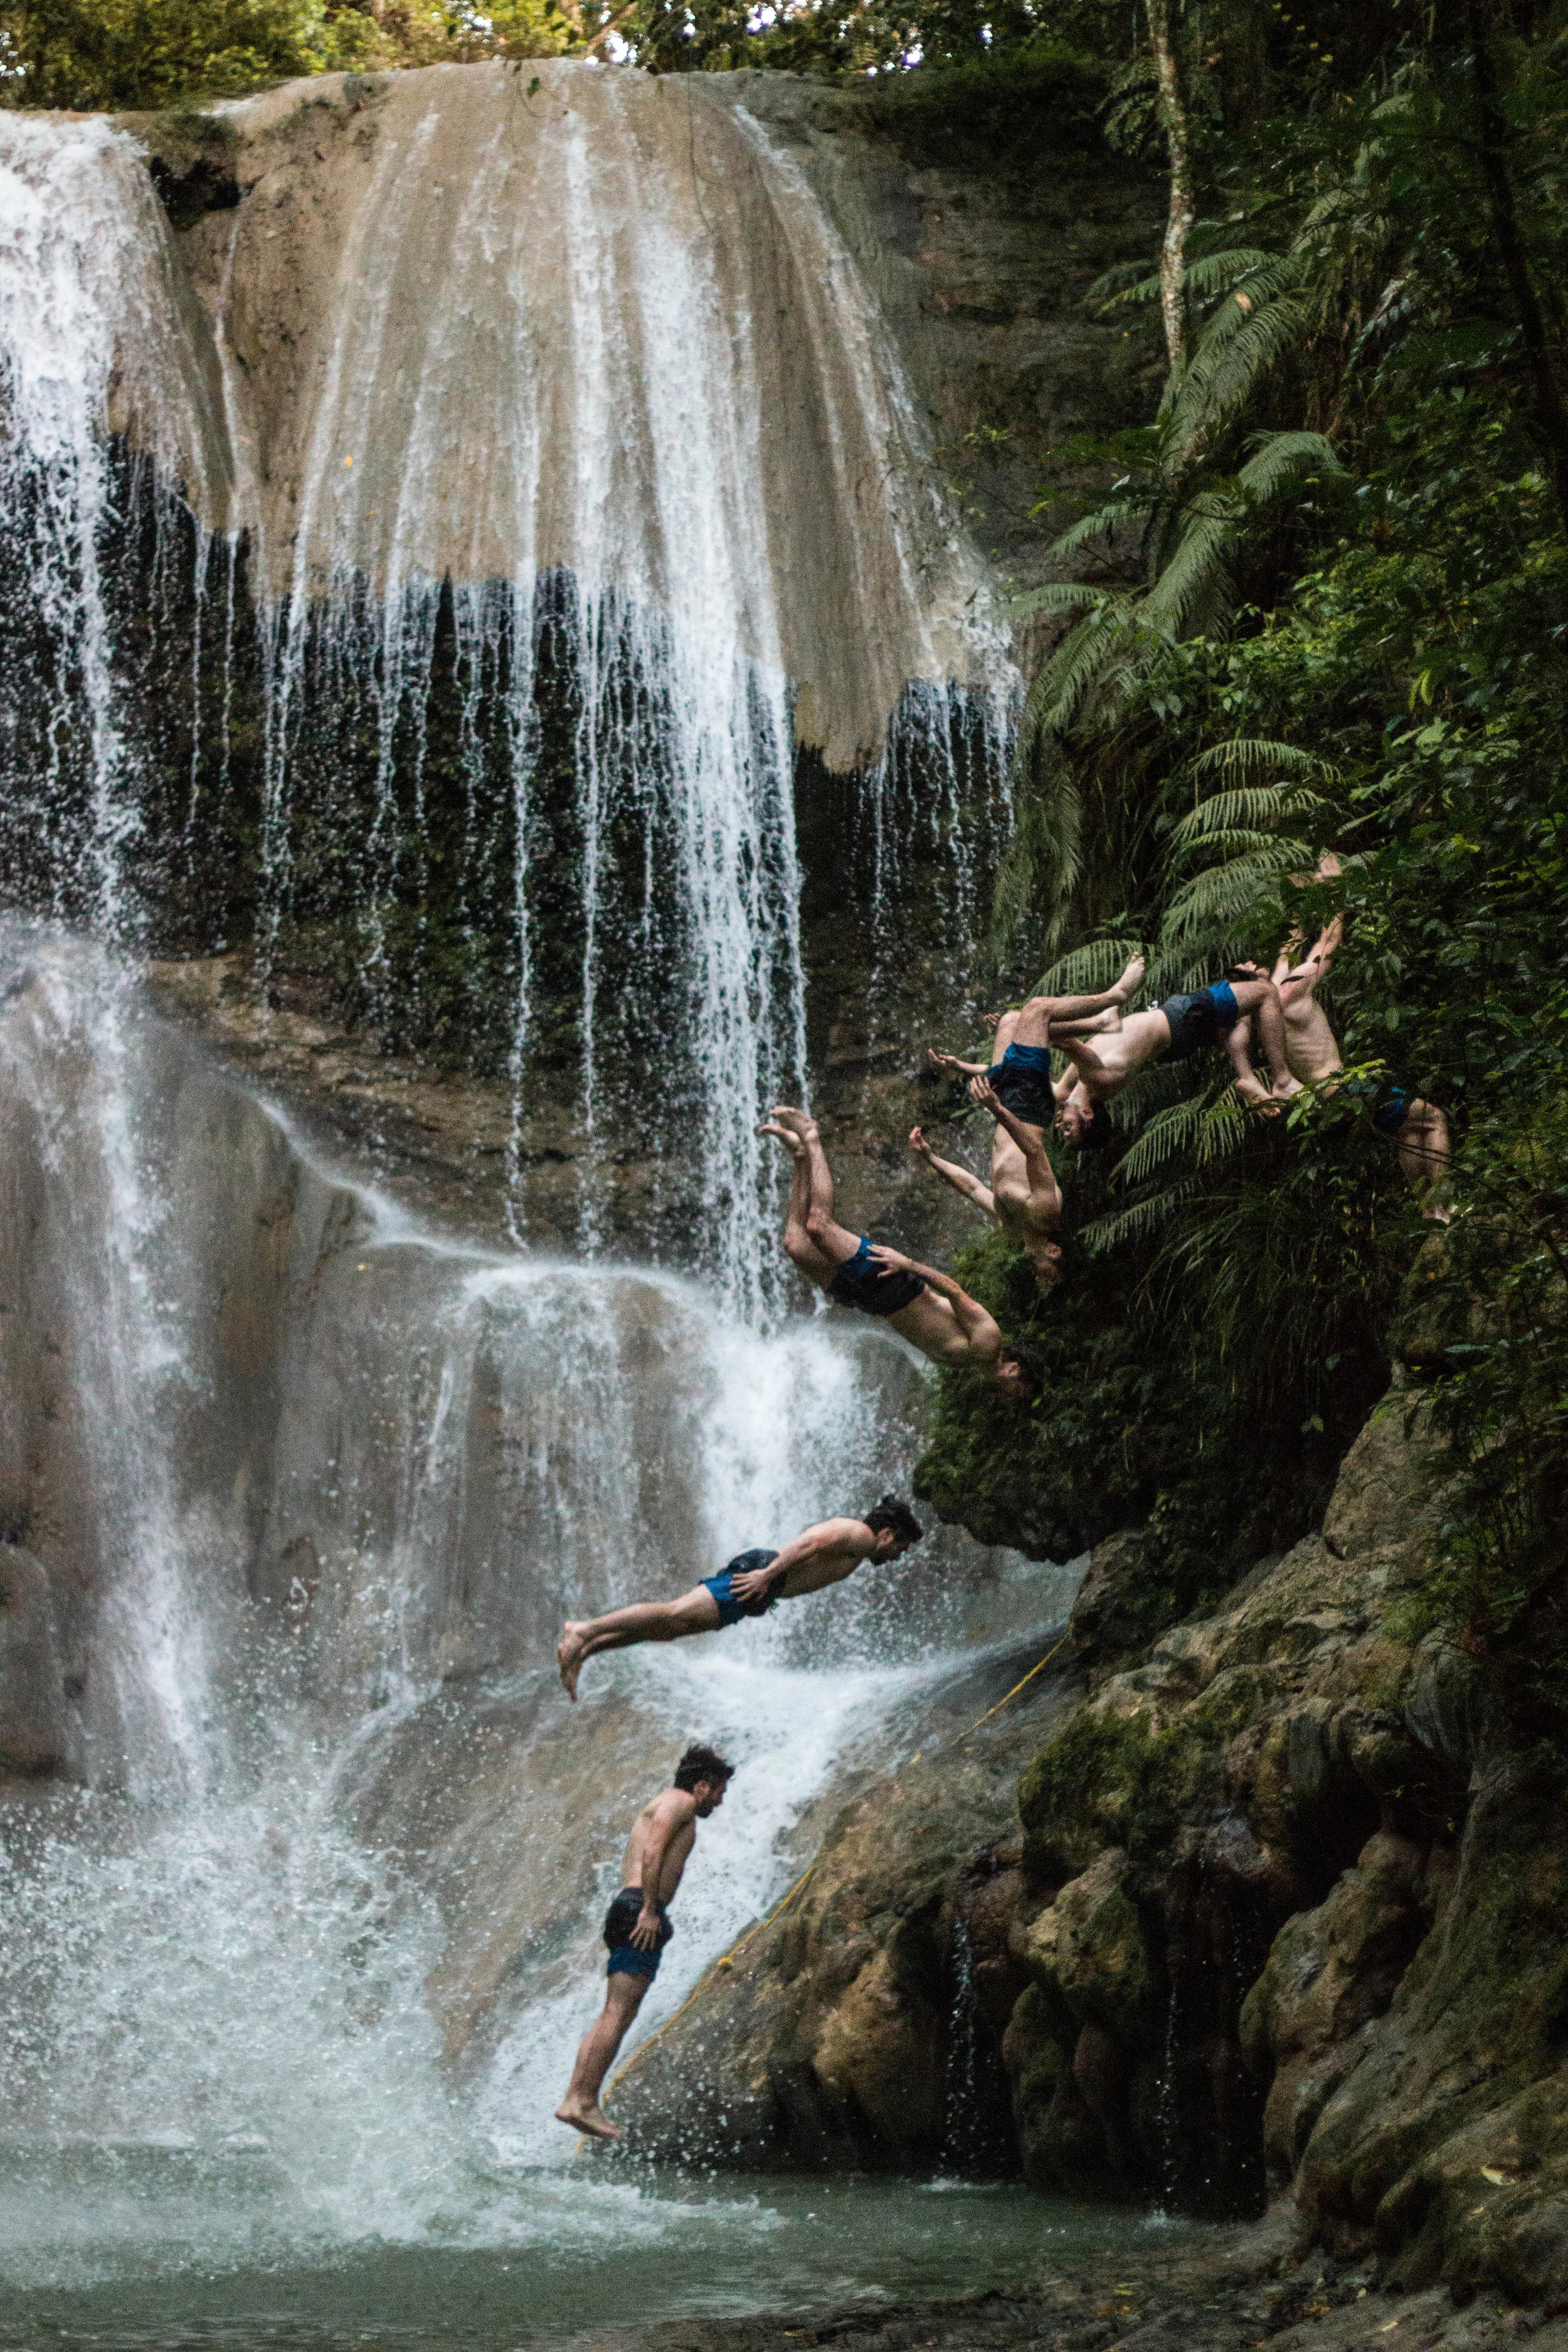
I made Ryan do three or four backflips before I got this sequence how I wanted it. Sometimes it's hard to visualize the area your subject will cover until you're shooting!
EDITING THE PHOTO
You've got your shots. Now it's time to edit them together!

Here are my four shots before being color corrected.
1. Color correct – In Lightroom, open up the first frame of your sequence and color correct to your liking. DON'T CROP ANY IMAGES (more on this later). Then, copy and paste those settings onto the rest of your shots. For a smooth photoshop job, it's important they're all edited the same.
To copy your first photo's settings, hit "develop > settings > copy settings > copy". Then add the other frames into Lightroom, select them all in Library, and "right click > develop settings > paste settings".
Now all your photos will be edited the same. Export them into a folder for the next step. If you don't have Lightroom, you can do a similar process in most other editing software!
Pro tip: If you're editing multiple sequences, save each sequence in its own folder.

These are the settings I copy for this process. If you're only messing with color correction, you can also hit "check all" and you'll be fine!

Opening your shots in Photoshop.
2. Open Photoshop and select "file > scripts > load files into stack > attempt to automatically align source images". Hit "browse" and select the folder with your sequence. Hit "OK". It might take 30ish seconds to load.
3. Crop your image. If you shot handheld, your file might look funky around the edges because your hands shook while taking the picture (this is natural). This is photoshop's automatic image alignment at work, and it's also why we held off on cropping until now. So go ahead and crop to your liking!

How your image might look before cropping due to Photoshop's automatic image alignment tool.
4. Arrange your layers. Each shot should be a layer, and you're going to rearrange these layers sequentially so that the top layer is your first frame, 2nd highest layer is the 2nd frame, and so on, until the last frame of your sequence is the bottom layer. Rename the top layer as "Frame 1", the next as "Frame 2", and so on – this will save you some confusion later on.
5. Start combining! Select Frame 1, which should be the first frame of the sequence, and make a generous selection around the moving subject. I like using the Polygonal Lasso Tool (keyboard shortcut: L. If another lasso is selected, change it by right clicking the lasso in the toolbar).
Once your subject is selected, right click the selection and hit "layer via copy".

Shoutout to the polygonal lasso tool
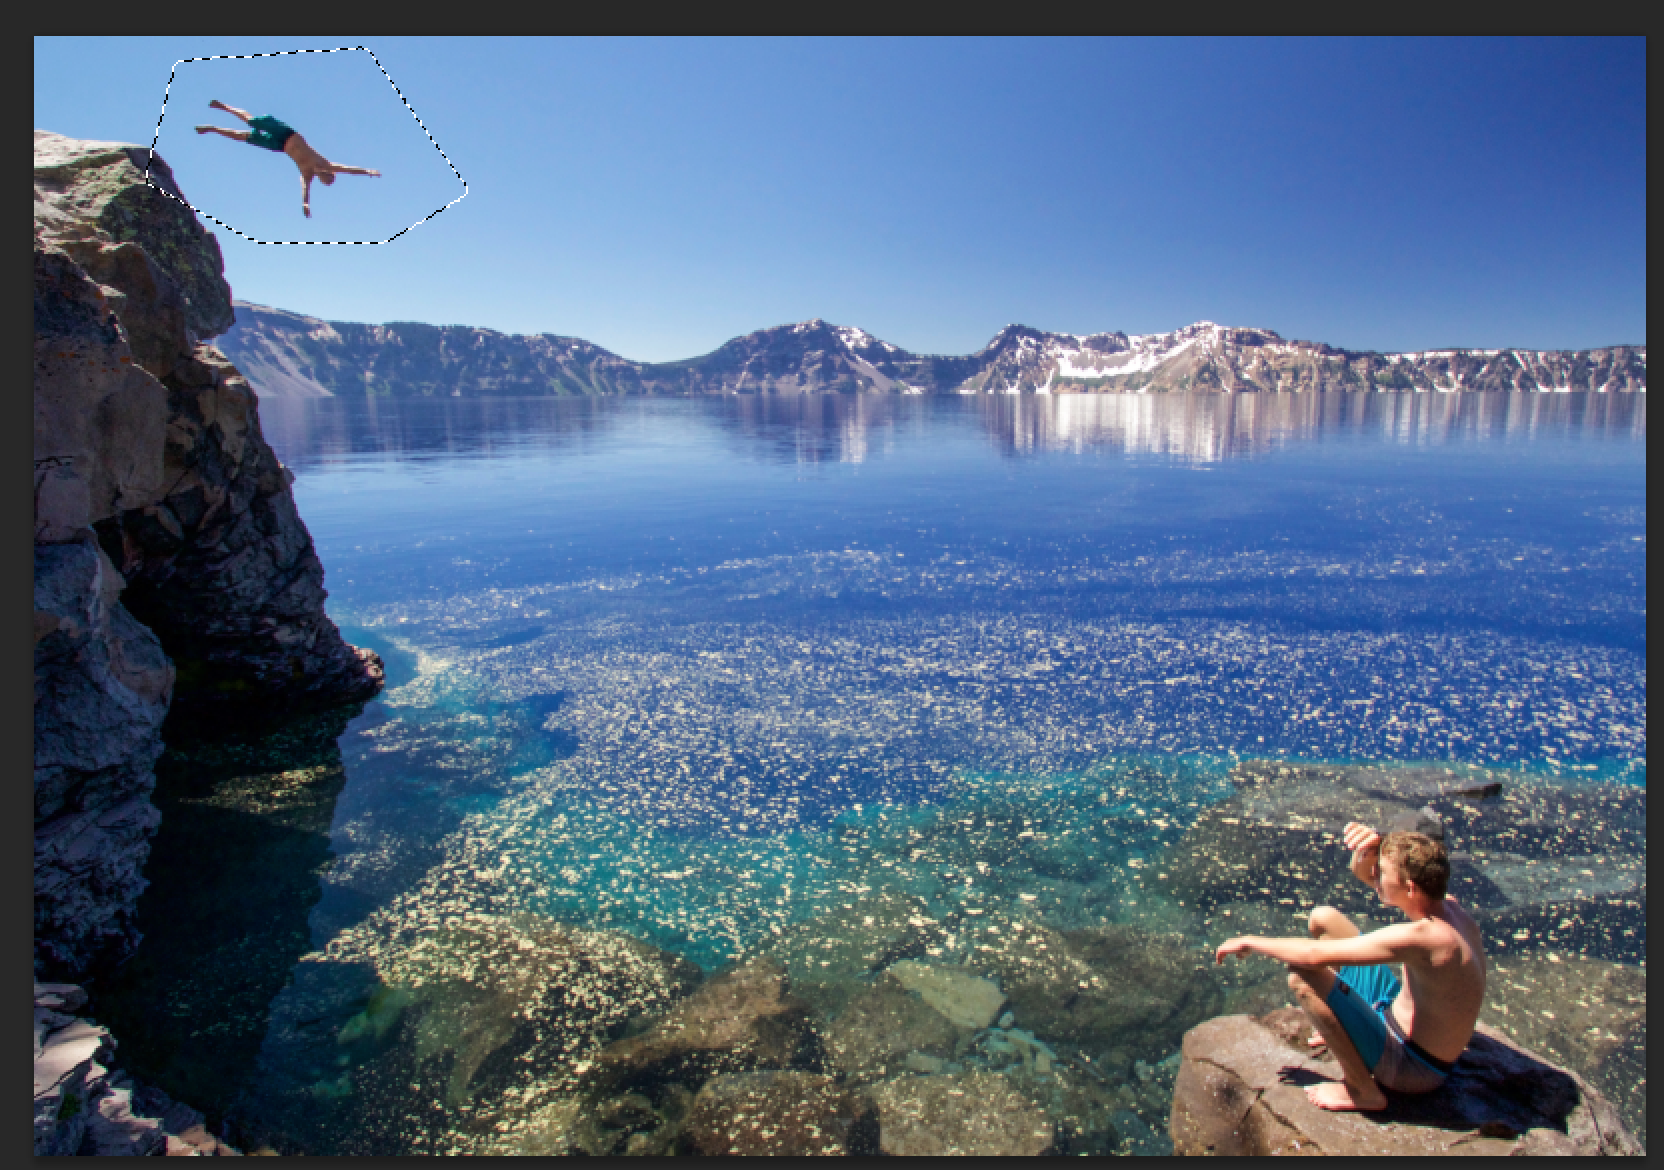
This is what I mean by "generous selection".
6. Turn off "Frame 1" layer so you can only see "Frame 1 copy" on top off "Frame 2" Using a very soft eraser (keyboard shortcut: E), work your way around "Frame 1 copy". Be rough with this, only erasing the edges of the selection. We'll refine this later!
Hint: to turn off a layer, hit the eye icon next to it! If you don't see an eye, it's because the layer is currently turned off (see image below).

Turning layers on and off. This is how your layers panel should look after completing step 7.

A large, soft brush like this will do the trick!
7. Repeat steps 5 and 6 for "Frame 2". Continue repeating this process for every frame except the last one (which serves as your base image). Afterwards, you'll have copied layers for every frame and turned off all the original layers. At this point, your layers panel should look like mine in the screenshot above.
Don't delete these original layers just in case you mess up or want to tweak with them more.

Repeating the process for every frame.
8. Select your frames! At this point, your image is either complete or almost there. You might have some redundant frames that only crowd the image and cause your subject to overlap himself. See how your image looks with these layers turned off. Make your final decision on which frames you'll be keeping before proceeding to step 9.
If you had a smooth, consistent backdrop (like the sky) and the subject never overlapped himself between frames, you should be done! Save as a psd (for future editing) and a jpeg for tossing it up on Insta!
More often than not, your image might still look like the one below with the subject overlapping himself. Next step!

9. Refine the erasing – if your subject overlaps himself between frames (like above) or the background wasn't super consistent, you're going to have to erase your subject's surrounding area in each frame more carefully. For this, select a harder eraser and closely work your way around the edges of your subject, erasing everything that ISN'T your subject.
10. YOU MADE IT... hopefully. If your image turned out perfect, toss it up on Instagram, tag me, and use #joshkatzphotos so I can see your brilliant work!
If you're still having trouble, you can watch the full screen recording of how I photoshopped the image above. You can also practice this technique on some of my shots, which you can download HERE.
Finally, if you have ANY feedback – what worked, what confused you, etc – shoot me an email. It'd be great to hear from you.